This post may contain affiliate or referral links, which means I may receive a commission if you purchase something using my link. It will be no extra cost to you. As always, thank you for supporting Getting Fit Fab.
Part of this post is Sponsored by Epson – as always all opinions are my own.
Can you believe that it’s almost Valentine’s Day? It’s crazy how quickly time can go when life is super busy, amirite? If you read any of my recent posts, CA isn’t a fan of Valentine’s Day, he thinks it’s basically a Hallmark holiday. Even though I find it special – my grandparents were engaged on Valentine’s Day and it always held a special place in my grandfather’s heart. I love the idea that over 50 years this holiday my grandmother got roses and a giant box of chocolates, what’s better than that? Well, maybe tacos and margaritas, which is what CA and I are doing! Since we’re going to Europe in a few weeks we’re keeping Valentine’s Day affordable, and with my favorite meal.
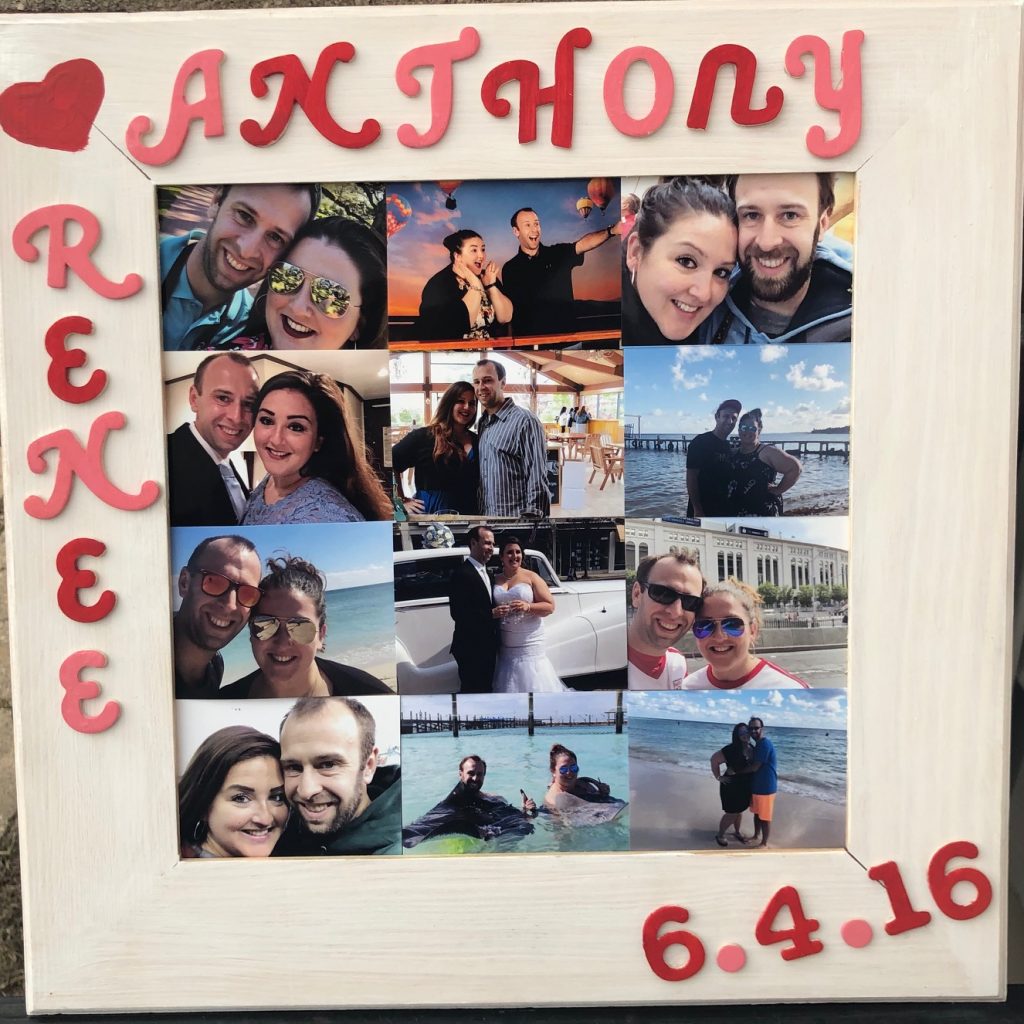
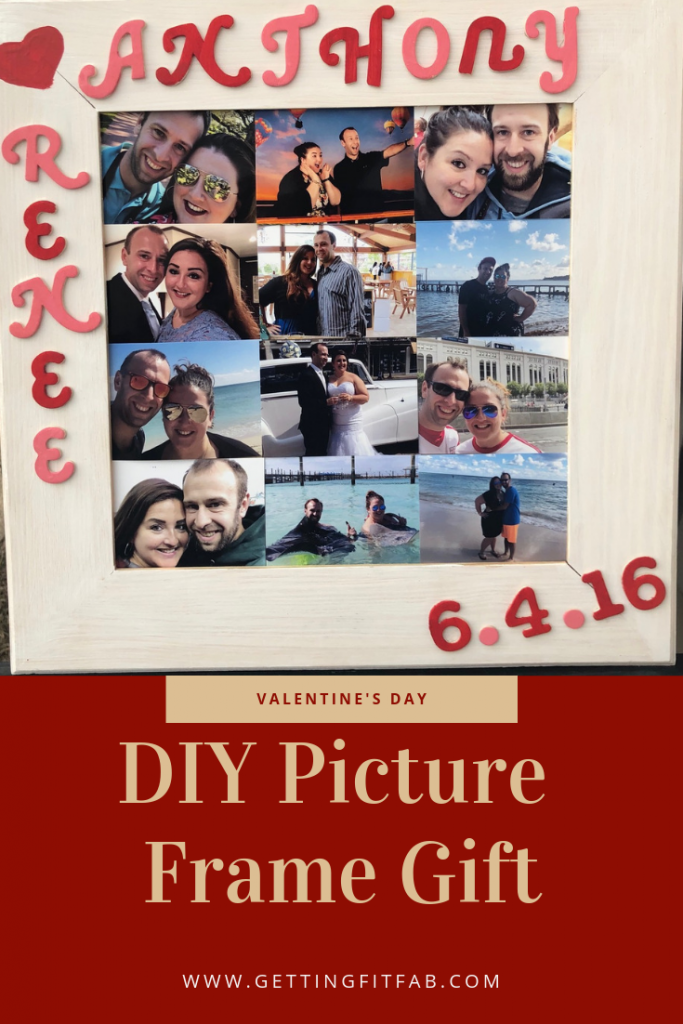
Just because we’re doing something simple, it doesn’t mean I can’t give CA something special. I love homemade/DIY projects that can be given as part of gifts, especially if they can contain photos. That’s what brought about the idea of a DIY Picture Frame! Even though it’s Valentine’s Day themed, you could make it fit your home decor, holiday you’re giving the gift for, or your favorite colors! You could personalize this so easily and it cost under $50 to make!
I bought everything besides the printer- at Hobby Lobby, it’s a one stop shopping place and I found everything easily.
What You Need:
Picture Frame 12″x12″ (or any size you desire)
Letters / Numbers
3 Colors of Wood Friendly Paint (I have white, pink, red)
Hot Glue Gun (usually they come with glue sticks)
Newspaper or anything that’ll protect the surface you’re working on
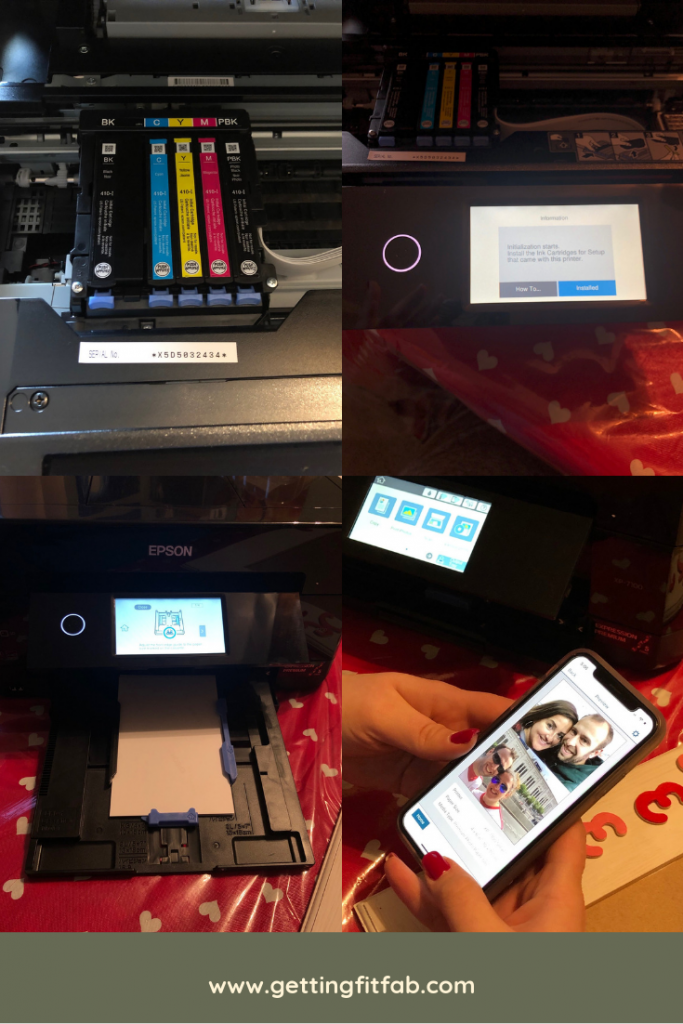
Photo Friendly Printer- I received the Epson Expression Premium XP-7100 Printer along with 10 4″ x 6″ photo paper.
Scissors & tape to stick the photos onto the back board
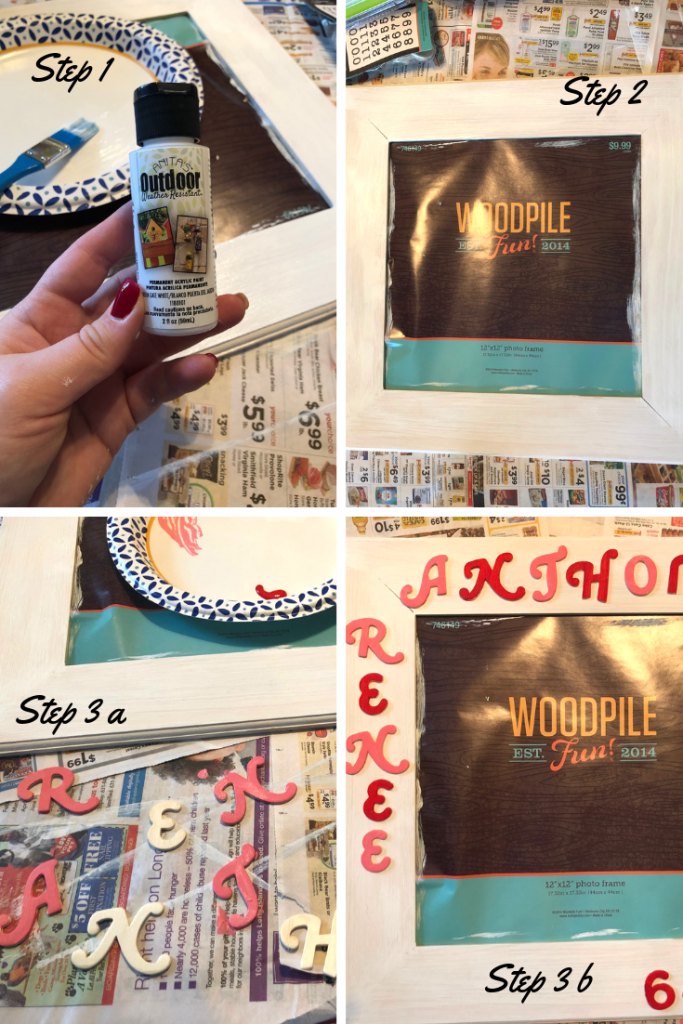
1. Set up your working area, lay everything out and make sure everything is within reach for the painting of the frame and other small pieces.
2. Paint the wooden frame first. I painted mine a white wash color, so some of the wood is peaking through.
3. While that’s drying, paint your small pieces, I painted the letters for our names, and the date I chose to add to the lower right of the frame.
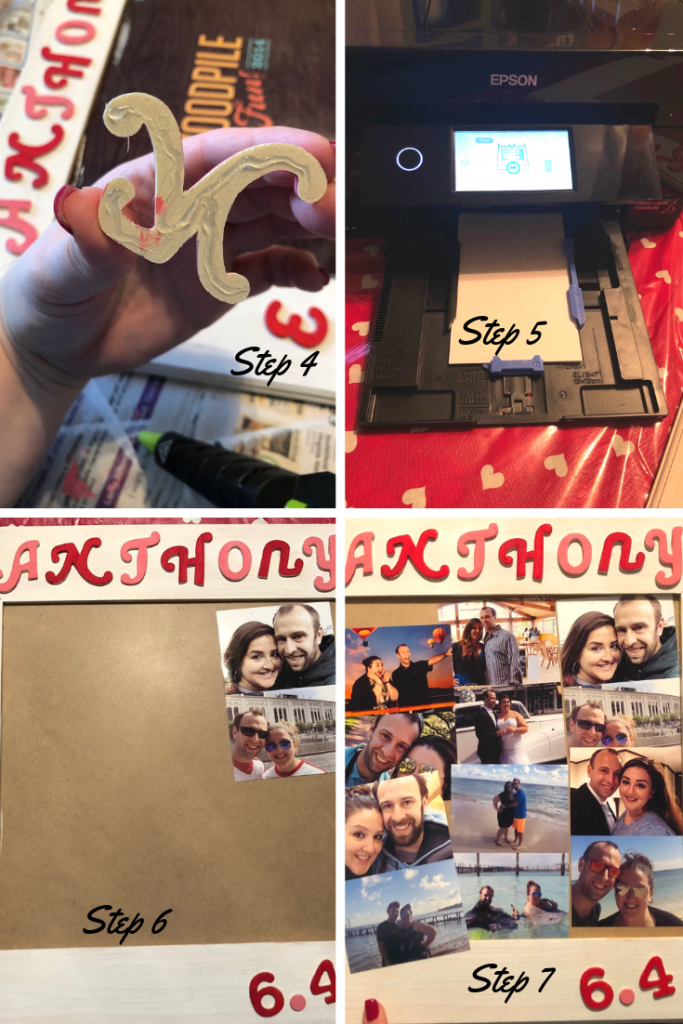
4. After everything is dry, plug in your hot glue gun and begin gluing all of the pieces to your frame. Hot glue will dry rather quickly once it hits the air, so make sure you apply the glue and place in the spot you desire.
5. While the glue dries completely, begin selecting your photos that you want in the frame.
6. Load the photo paper in your printer and whether it’s from a computer or app like the EPSON app where you can select the collage option to print two photos on a 4″ x 6″ paper. I love that I was able to print out 12 photos with only 6 photo paper, and they all fit on the frame.
7. Cut the photos to fit your frame and use regular tape to stick to your backboard and put everything back together and tada! You have a photo filled DIY picture frame!
This is perfect for your significant other, grandparents, parents, friends, literally anyone and everyone! I love how simple this little project was and completely affordable! CA loved this frame, it has so many pictures of our travels and what we love to do, going to a RedBulls Soccer game!
When Epson reached out about reviewing the printer for a Valentine’s Day DIY project, I knew what I wanted to make. CA and I love taking a lot of photos together, so we try and print them as often as possible. I received was the Epson Expression Premium XP-7100 Small-in-One Printer, it can print photos, important documents, envelopes, and CD/DVDs! It contains 5 colors, prints wirelessly, and you can print from the Creative Print App just like I did. I think I love how small this printer is, it can fold up small so you’re able to keep this in a compact place without taking up too much space. The 4.3” touchscreen allows you to view, edit and print photos, directly from a USB or card slot. It’s perfect if you want to want to print photos quickly, maybe after a vacation or time together with family.
Have you ever made a DIY project for anyone? This one was simple enough to complete on a Sunday afternoon under an hour! Let me know if you try this, don’t forget to check out this Epson Printer for all of your printing needs!

